Speedy Component Replacement
By:
Al
Klase
The
obvious way
to
replace a leaded component, such as a capacitor, is to
“excavate” the
two
solder joints using a solder sucker and various tools to clear the
solder
and unwrap the wire leads from the terminal. Unfortunately,
this
is not only time consuming, but is also likely to result in an
unsightly
mess if not actual damage to irreplaceable parts. All too
often
the
component being replaced was the first one wrapped around the
terminal.
Even if the repairman exercises extreme care, the original
craftsmanship
is destroyed.
|
An
answer
to this
problem comes to us from the 1950’s. Sprague
capacitors, packaged
for replacement service, came with devices called quigs.
These
were
small spirals of wire heavily coated with solder and flux.
The
recommended
procedure was to cut the leads of the old components leaving a generous
stub. The new cap was then sleeved onto the old leads with
the
quigs.
A brief application of the soldering iron completed the job.
Quigs
are
now vanishingly
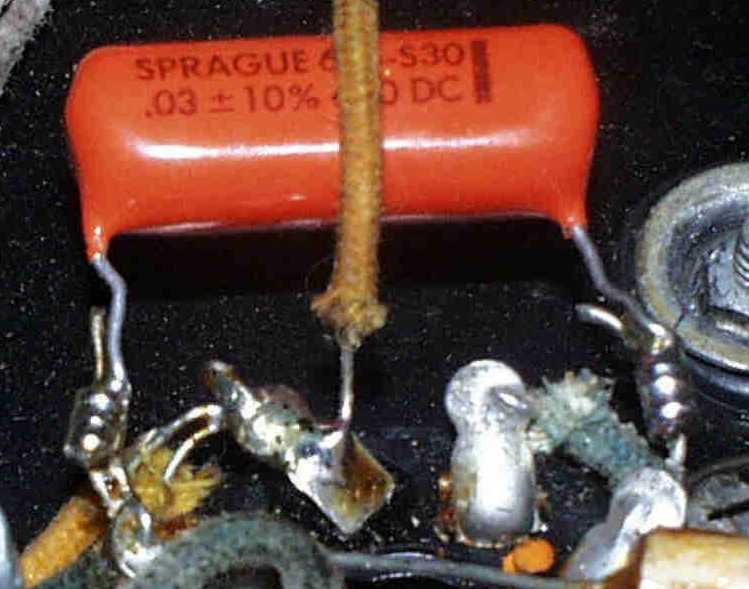
rare, but a similar technique can still be used. Cut the
leads of
the old part near the component body. Twist tight
“pigtails” in
the
leads of the new device. Thread these over the old wires, and
solder
in the usual manner.
|
 |
 |
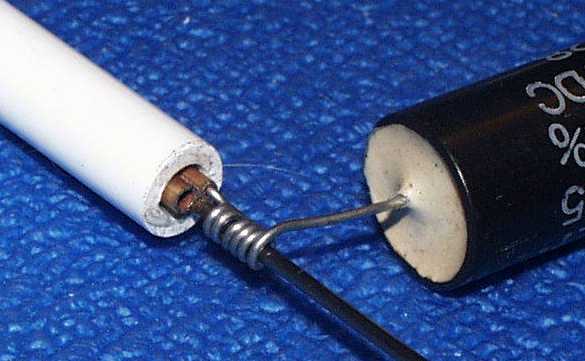
A
convenient tool
for forming the “pigtails” can be fashioned from
common hobby-shop
materials.
It consists of two short lengths of brass tubing, 1/16” and
3/32”
diameter,
soldered to a length of 0.040” music wire, and glued into a
handle made
of thick-walled 5/16” plastic tubing. When the end
of a component
lead is inserted into the brass tube, a neat spiral can be quickly
formed.
|
Another
alternative
is a stiff piece of wire or drill rod held in a pin vice.
With
luck,
the collet will have sufficient open space to insert the end of the
lead.
This
technique
allows
a capacitor to be replaced in just a minute or two, even if its buried
deeply in the chassis. (This is a real boon when doing a
Hallicrafters
SX-28!) The results are tidy and preserve the original
craftsmanship
of the radio.

